Wednesday, December 28, 2016

Look at that Doggie/Cat Quilt in the window . . .


I don’t’ know why but that song “Look at that Doggie in the Window” comes to mind when I think of these quilt hangings.
Both of my boys have pets, so I decided to make some wall hangings to commemorate this for the holidays.
One son and his wife has a dog, so I had to do a quilt with dogs in it.  I came across this adorable quilt, “Mixed Muts” by Lunch Box Quilts:


I did the wall hanging version. 

For this quilt I did 4 rows of parallel quilting in the outer border and a row of decorative stitching at the top and bottom of each dog square.

My other son and his wife have 2 cats and a dog, so I had to do a wall hanging that reflects that.  Lunch Box Quilts also makes a version of the above quilt but with
cats.  It’s called, “Cat’s Meow”:

For his quilt, I combined squares from the two quilts, so that I would have 2 cats and a dog.  


On this one for the border I got a chance to try my free hand quilting in the outer border.


This was all applique embroidery and was done on my Bernina 830.  These are simple quilts to make.  Its just a matter of "hurry up and wait", as you are swapping fabric for the applique parts.

Sorry for the poor quality of pictures; but took these in a hurry as my kids were heading back home.

Hope you all had a Merry Christmas.

Happy Sewing. . . .

Tuesday, December 27, 2016

Honey, I shrunk your dress!!!

Well remember all the sewing I posted a while back.  I got it done.  I made three knit dresses and was loving them. Especially the one made from this wool knit:

It turned out just the right length, and fit.  I wish I could show you post a picture of me in it.  But . . . . .

I only got a chance to wear it once!!!  My husband decided he would wash it.  I don't know why, it didn't need it.   (I know he was trying to be nice, but sometimes I just can't handle him being nice 😔).

Between the washing and the dryer spins, the dress was done for!!  Remember this was a wool knit fabric!  From looking at the picture it looks OK, right?  Wrong!  First of all the neck-opening shrunk; I can no longer get it over my head!  Second it shrunk thru the side seams, the width is about 3-4 inches; that's a lot when you have "back". Third its about 6 inches shorter than it needs to be.

You should have seen his face when he realize what had happened!  I tried to play it off as no biggie; I'll just make another.  I was disappointed though.  He told me to see if I can find some more of this fabric and he would pay for it (I bought this fabric a couple of years back on the JoAnn's clearance table at 50% off!; but I'll keep looking).

His intentions were well meant, and I'll have to keep telling myself that "He's my babies daddy" 😏.  

He's decided not to attempt to wash any of my knit dresses anymore without my approval.

Oh well, "What doesn't kill us makes us stronger!".

Happy Sewing.....

Tuesday, October 18, 2016

A little prep work . . .

So this weekend, my husband decided to take a little trip to see our daughter.  That meant I
had the opportunity to "cheat" on him.  Yes I said it!  

I admit it and I'm not ashamed.  It was me; alone with my patterns, my sewing machine, fabric, and scissors.  I spent the entire weekend cutting out patterns!!!! In preparation for next weekend.

So what did I cut out?  I'm glad you asked.

First was Simplicity pattern 1278:
I hd already done an initial fit on view C of this one.  So I'm doing a second muslin of the top to make sure all is well.  So I cut out the muslin.

Then there was Butterick 6326:
This one I haven't made yet.  So I cut out a muslin of view B.   I always have to lengthen my dresses and skirts and alter them in the waist/hip area.

Once I've got my muslin done this week.  I'll make these out of the following:


Next I went to my tried and true turtleneck dress pattern.  It is a vintage turtleneck top pattern (Simplicity 5185) that I lengthened into a dress back in 2015.  Well those dresses have seen better days.  Its now time to replace them.  I cut the first version out of a knit hounds tooth that I found a couple of years ago on the "red-tag" table at Joann's:
This version of the dress is just blow the knee.
Then I had a black and white knit that would look great in a maxi version that I can wear with boots:
So here is the stack of my cut patterms.  You know before you cut the fabric, it looks like a hugh amount. But afterwards it always appear mor manageable.

Another thing I did was to buy several mailing tubes.  I trace all of my patterns and then do the alterations on the traced patterns.  Well its always been an issue of how to keep the traced patterns.  So I figured Id start storing them in mailing tubes like these:

I'll let you know how it turns out ......

Happy Sewing . . . 

Tuesday, October 4, 2016

The T-Shirt Quilt, amongst other things

Yes I'm still here!

This past couple of months have been stressful and challenging.

I just recently started a new job at a new company.  So I'm going thru the normal transition period. My former employer is going thru a lot of churn/change.  It's still hanging in there; but folks are leaving fast.  It is currently up for sale.

As for me, my stress levels went down tremendously!  I can even focus on my sewing again.

Also, my last one has left the nest!  She is out in the big blue world, on her own.  Praise God she got the hospital residency that she wanted (BTW, she's a pharmacist), and loves her job and the environment.

My parents and my daughter at her graduation.

As I get adjusted to her not being here; I was cleaning out her room and getting rid of un-necessary clothing.  She had lots of t-shirts from her days on the Women's basketball team at University of Wyoming.  Voila!  Look out T-shirt quilt, here we come. Here's the finished quilt top.

The T-shirt Quilt
 My daughter wants me to turn it into a lap quilt; but I think this one is destined to be a wall hanging.  The girl is over 6 feet tall!  I'm not feeling a lap quilt.  Besides I just did a rag quilt for her that was a twin size!  My husband says she's just spoiled.

Since each logo was a different size; I just sort of filled in the gaps with diagonal strips till all of the
rows were the same size. Now I've just got the quilting left to do.  I've been trying to perfect my machine quilting technique on small potholders.  This will be my first piece of some size.

Now that I've gotten my life back, expect to hear more from me.

Happy Sewing . . . .


Saturday, April 30, 2016

The Prima Diva Wallet

I found this wallet pattern at a little quilt shop in Provo, Utah.

Its called the "Prima Diva Wallet".  I love it!!!  I had been looking for something that I could
put "EVERYTHING" in.  If you are like me you have more cards (credit and store loyalty) than you have space for in your wallet. Then there is the checkbook, coins and cash bills too.  I had not been able to find something compact enough to carry everything until I discovered this.

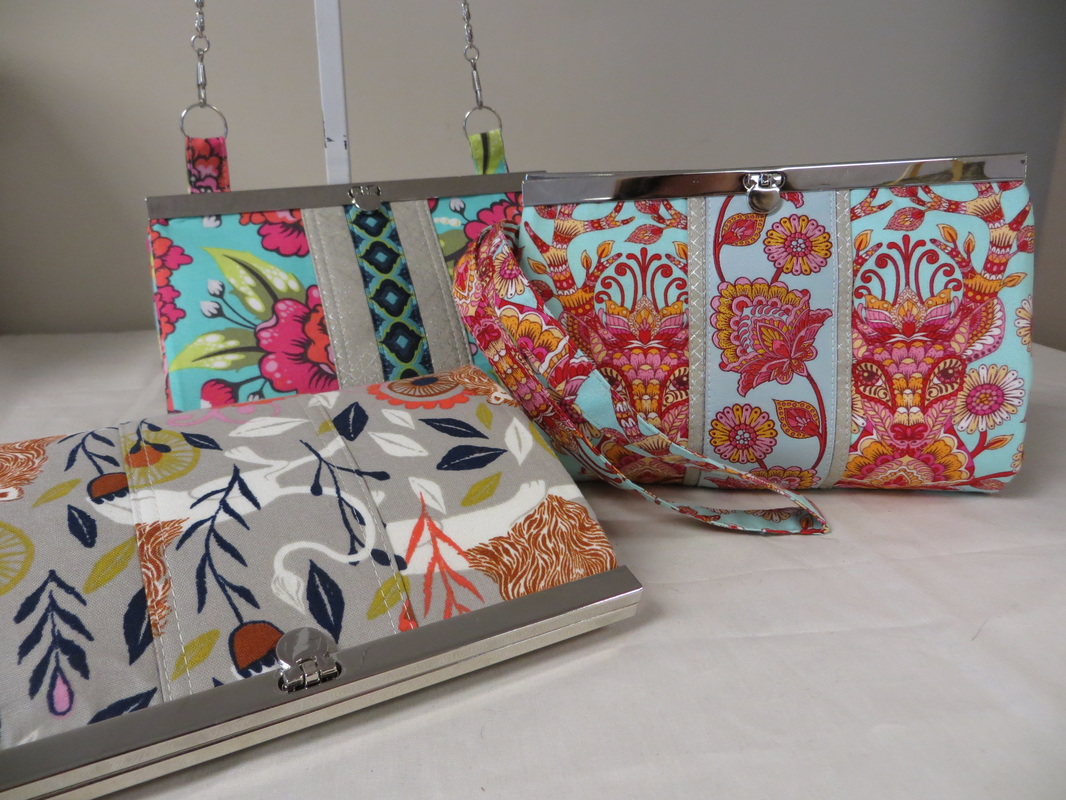
My version of the Prima Diva Wallet filled with belongings

Photo from Sew Many Creations  (sewmanycreationsny.com)

I made mine out of an ethic print in a bold colors.  It holds everything I need and even fits into my Fossil Crossbody Bag.  Whoopee!!!!  I love these so much that I will be making more of them.  All of the women in my family will receive them as presents. That's 6 total on my sewing list.

My only regret is that I didn't do the loops for a chain.  So I will be doing that on all of the new ones; and I'll be making another for myself.

The wallet went together very easily.  There are very detailed instructions for the construction, and a step by step sewalong that was hosted by the designer of the wallet on her blog: "Prima Diva Sew-Along",  I used fabrics from my stash.

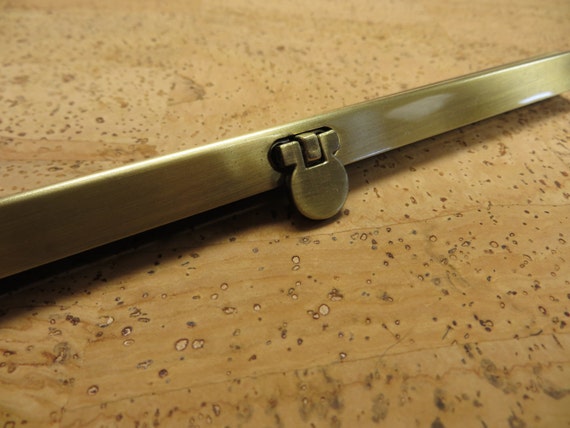
I purchased the wallet closure from Sew Many Creations Etsy Shop.  It comes in silver, brass, and burnt antique.


The most difficult thing to find was the Pellon Decor Interfacing.  I was able to find it at Hobby Lobby in the weight that I needed.  Also, I think you could just as easily use mini binder clips
 that you can get from staples instead of the Clover clips.

One thing that I did do was to make plastic templates for all of the pattern pieces using quilting template plastic.  This made it easier for me to keep track of all of the pieces, and will make it easier to complete the others.


2 zippered compartments

2 credit card holders areas that have over 12 slots

There are two compartments for bills, and between each compartment is are storage area's
To see photo's of other wallets

Now on to complete the other 6 wallets!!!!