Showing posts with label dress. Show all posts

Wednesday, September 26, 2018

Vogue 2067 Donna Karan


I've had this pattern in my stash for quite some time.  Last year before my sewing mentor passed away she helped me alter the pattern (you'll see why in the pictures).

I decided to make View B.  I did my initial alteration of widening thru the hip.  Here is a picture of the initial dress I made in a grey knit:

Front View.
This is the front view of the dress.  I got the fit down pretty good.  Of course I forgot to lengthen this, so it placed it at just below my knee.

Side View
However, when I looked at the side; this was just way-y too low in the arm and back area.  There was no way I could wear a bra with this (not even a strapless one).  Besides I'm not into showing that much of my back and sides.  

So my first job was to alter the dress in those areas, that means bringing up the side and back.  The key thing was to alter the side and back pieces correctly since the side seem is actually along the back:

As you can see from the line drawing the dress is cut pretty low in the back.  So off to do my alterations I went.  The pattern pieces for the dress are circled.


The side and back pieces was alter as shown on the picture; the light blue line represents the original pattern:
Back
Side

So I re-made the dress with these alterations in a black knit:


 Here is an image from the side, so you can see how much I raised the side.


The back has been raised considerably (now I can wear a strapless bra with it). And finally the front view:

Needless to say it lengthened it. Although it looks floor length on my dress form, its just above the ankle on me.  This dress was more comfortable for me to wear.  I still wear the first dress; but as a jumper with a t-shirt.

As I look at this dress on the dress form; I think my next project will be to alter it to my size.

Also, I made the dress a third time in a brown knit.

Happy Sewing!


Saturday, August 18, 2018

If at first.....

So I decided I wanted to make Simplicity 8641.  As you can see from my project sheet, I chose a striped denim chambray.


I had this wonderful notion that I shouldn't have to do any alterations, since the dress didn't appear to have any shape.  Well, I was almost right.  The operative word being "almost".  Turns out the dress fit, but was snugger through the hips than I am comfortable with.  This is why I always try to make a muslin first, to avoid these types of disappointments.  The finished jumper turned out very nice thought: 


I was so pleased with how it turned out;  but disappointed that it was too snug through the hips.

So, this is why you should make a muslin or at least do a little extra in the seam allowance to allow for adjustments.

So I decided to remake the jumper.  I had another piece of fabric that I got from the thrift store (I buy fabrics from the thrift store to use for creating muslins of my garments).  I had 3 yard piece of a red chambray:

Needless to say this version turned out to be an excellent fit.  I ended up making the back skirt a size larger (I cut the upper bodice and front a size 16, and the back a size 18), and added a 1 inch seam allowance just in case.  This muslin will become a wearable one.


It is a very comfortable dress, and I will definitely make it again.  I have another dark blue stripe chambray, so I'll give it another try.

I thought about making myself fit the original (aka diet); but remember the purpose of sewing is to make the dress fit your body; not your body fit the dress!

Happy Sewing!

Monday, September 28, 2015

Burda Pattern 7053 - the Hourglass dress

Well I’ve been obsessed with sewing lately. This time I decided to work on some purchased patterns.

First is Burda 7053.  About a year ago I saw a maxi dress with an hourglass inset (I believe it was on “Prettytallstyle” blog; but can’t seem to find the link now).  It looked very similar to the dress below.  From the reviews on this dress, the fabric is WAY-Y-Y-Y too thin.  Also, I’m not sure if I like how the shoulders are cut in so far (maybe next summer I’ll give it a try with a similar neckline).

When I saw this Burda pattern I knew I wanted it and had to make it.  
I chose to make a fitted version just below the knee with a red/black striped inset.
It was time for me to dust off my serger (Lately I’ve been using my standard machine with a tiny
zigzag to sew knits; primarily because I am too lazy to switch machines).  I'm glad I did, it just gave it a polished look on the inside:
Finished inside seam (4 thread overlock serged seam)
Most of the construction of the dress was done using the a 4 thread overlock on the serger.  
Inside seems of front panel
The facing at the neck and sleeve openings were basted in place first and then topstitched with 1/4 inch topstitching.  The hem was done using a twin needle:

The finished dress: 
Front View

Burda 7053:

Pattern Descripton: Women's knit dress with "hourglass" insert in front, View A

Pattern Sizing: size 6 to 18 (sewed size 14 with alteration at hip)

Did it look like the photo/drawing on the pattern envelope once you were done sewing with it? Yes

Were the instructions easy to follow? Yes

What did you particularly like or dislike about the pattern? The pattern was very easy to sew.

Fabric Used:
red/black stripe ponte knit and solid black ponte knit from Hancock Fabric (part of my stash)

Pattern alterations or any design changes you made:
  I did chose to make the dress
into a midi rather than a maxi or short version.  In addition I started with a size 14; then I did my standard alterations of 6” to length,
and altered at hip line to size 18.

Would you sew it again? Would you recommend it to others?
Yes, this dress was very easy to sew,
it only took about 2 hours for me to complete (experienced sewer) using my serger.

Conclusion: The fit of this dress is exquisite, and is just right (not too tight, not too loose). And of course because I made it, I could get the length to the appropriate size.  I’m going to make this again, but alter the neckline for a turtle neck and add inset sleeves.  I’m also going to use a solid for the inset (I’m prepping for fall/winter).

The fact that this is essentially a princess seam knit dress means its much easier to make fitting alterations.

Happying Sewing . . .

Tuesday, July 19, 2011

Some Pattern Organization and Some Sewing. . .


I've finally gotten my cabinet painted, and moved up into my sewing room. I've still got to put my lettering on it; but I think it turned out pretty well. It's when I started to put my patterns into the cabinet that I discovered how many I really had. I have way more than I need and not as many as I thought .lol

Having the cabinet has helped with my storage situation.I've started putting some of my patterns into the drawers. I knew I had a lot of vintage patterns, enough to fill an entire drawer alone.

I went from 5+ boxes/containers to 3 drawers. (Between you and me, now my husband will never really know how much sewing stuff I have. wink )


Well now that I've discovered that I have a rather ominous assortment of patterns, I figured it's time to organize them in some type of manner that makes sense etc. So I put them in the file cabinet in order: vintage patterns in one drawer, another with Butterick, Mccall, Simplicity, another with Vogue, and a 3rd for other companies. The bottom drawer has notions like zippers and serger threads.

I also discovered a pattern filing software: PatternFile. Its a relative new software that is internet based. So far I like it. I've got most of my current patterns entered. Its when I started putting my patterns in this tool that I realized, I'm a Pattern Junkie (PJ for short) smile.

They have a pattern database that is updated monthly, and when you add a new pattern, if it is already in the pattern database, then all of the pattern info is filled in automatically (yardage, line drawings, etc.), otherwise you can add the info for other patterns (such as vintage patterns).

The software is still in its early stages but looks very promising. I'd love to see it be accessible from say a smart phone, and am waiting for them to develop the print option. I'm going to continue to play with it for a month or more, and then I'll add a review.

Now what have I been working on (Sorry for the mannequin, but its dark here now, I'll post pix later of me in the dresses). Well I just finished two dresses:

Mccall 6324


Pa
ttern Sizing: B5(8-10-12-14-16) I cut size 14/16
Fabric: 100% cotton print, and broadcloth

Description: Fitted dress has a self-lined bodice with exposed zipper, no sleeves with peach colored ban around hemline.

Alterations: added approximately 4 inches to overall length, so that dress stops just below knee. Also took in at the waist area, and thru the Bust some.

I started with a size 16 and adjusted it in at the waistline. The dress is a partial "princess seam" style from the bust-line down. I've typically have to do some adjustment in the bust-line. I started out with a size 14 in my muslin which was a perfect fit; but decided to do another in the size 16 and adjust down accordingly. This resulted in me taking in a dart slightly at the armhole to allow for the bust-line fullness. I was concerned going with the 14 would be too tight once I did the dress in the final fabric. (To avoid having a dart in the bodice, I adjusted the yoke pattern for the dart). Since I made the dress in a size 16 for ease thru the bust, I then had to take it up through the waistline.

Once I did that and added additional length the dress was a perfect fit.

To deal put the exposed zipper in, I hand basted to confirm the placement, and then did the top stitching on the zipper. One thing you definitely want to do is pick your zipper first and then match the fabric to that. You need to use a brass type zipper which will really show, and the color selection for these are limited.

Its a nice comfortable summer dress. I'll post pix of me actually wearing it later this week. I'll probably make the dress again; but next time with the short sleeves.

Mccall 5844 OOP (2nd time around)

Pattern Sizing: EE(14-16-18-20) I cut size 14
Fabric: 100% cotton print, and broadcloth

Description: Fitted slightly below mid-knee dress with front and back yoke. Has a front drape and side zipper.

Alterations: added my usual length adjustment. Also took in at the waist area, and thru the bust area.

I just love this dress. The first time I made it was Sept of 2010, almost a year ago. And since I've made it once the 2nd time around was easier. One thing that happened is that I underestimated my yardage on the print. As they say necessity is the mother of invention; so I just used the solid in the yoke for the draping. The fit is amazing! I've found that princess seams are easier for me to adjust the fit because of the multiple seams across the front/backup.

Sunday, September 20, 2009

The dress that almost made it to Baltimore

Well, we completed our trip to Baltimore. I got a chance to go to G-Street; all I can say is I think they need to open a store in Denver! I got plenty of bounty from there, which I'll talk about later.

Prior to leaving though I was working on a dress that I was hoping to take with me but didn't get done in time, so I finished it up when I got back. (I only had the facings on the neckline and arms to complete).

There are quite a few things I learned but the most important is to ALWAYS DO A MUSLIN, no matter how simple the dress may seem. Just luckily I had enough fabric to make the dress twice!
I made the dress view starting with a size 14. The changes that I did to the pattern were:
  1. Took in at the waistline
  2. Added an additional 2 inches at the hip line.
  3. Changed the hemline so that it was straight rather than asymmetrical
  4. Used a serged rolled edge hem on the ruffle on the dress hemline
  5. Removed the zipper all together and just had a slit opening, since the dress ties at the neckline. (The dress had a tie opening for the first 8 inches then a zipper which extended to the hip)
I used a fabric from my stash that was a Georgette, and a solid red Georgette for the lining. This was probably the most difficult and time consuming portion of making the dress. Since it was sliding I ended up cutting it on top of a layer tissue paper. (Another reason why I didn't want to deal with a zipper in this dress).
The pattern was only 5 pieces: front, back, bias trim for neck & armhole, ties for dress back, and ruffle on hem. At first I figured that this shouldn't be that big a deal as far as the fit so why do a muslin (famous last words as always!). Well I forgot that I am a woman with some stuff in my trunk so the first version was too snug through the hip line. Thank GOD I had bought 6 yards of this fabric when I originally purchased it. So now I got to do it over, but this time I did up a quick muslin.
Dress on my old dress form (time for an updated form, but that's a different posting at a later time):
The completed dress on me (Sorry, my official photographer is off to college, and my replacement photographer is watching a football game - SMILE - so in the meantime I'm doing my photos.)
So here is the fabric that I will make the 2nd go around of the dress in:

Sunday, July 26, 2009

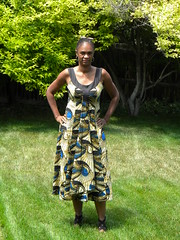
Mccall 5844


Front View of Dress

With Front Ruffle Extended

Fabric: Cotton [See other projects in this fabric]

Pattern Description:
Mccall 5844:
Fitted, slightly flared dresses A, B, below mid-knee or above ankle length, have front and back yoke, princess seams, front drape and side zipper; contrast or self-fabric yoke embellished with jewel stones or beads as desired.
Pattern Sizing:
14-16-18-20; cut pattern out in size 14

Did it look like the photo/drawing on the pattern envelope once you were done sewing with it?
yes

Were the instructions easy to follow?
yes, very easy. Note if you are not used to working with corners, then take special care to include the ruffle in the front correctly. Otherwise very simple to make

What did you particularly like or dislike about the pattern?
Nothing

Fabric Used:
A African Print fabric that was in my stash.
Pattern Alterations or any design changes you made:
Had to add my usual lenthening of 4-5 inches. Also, had to take in at waist area.
Would you sew it again? Would you recommend it to others?
Yes pattern is very easy to make, and I will be doing again (when I find the right print. Also, if you are going to make, ensure that your fabric doesn't have a noticeable wrong side. The fabric I used looks the same on the wrong and right side. The center front ruffle can be seen from both sides (depending on how the wind is blowing )

Conclusion:
Very easy dress to make, Took me longer to actually cut it out than sew it. The fabric I used had a design, such that it alternated directions for each row of the design printed on the lengthwise grain. Therefore had to cut each piece in single layers to ensure pattern of fabric flowed in the dress

Thursday, April 30, 2009

The Dress is Done

Well, prom is over and I get the dress done just in time. I started with a size 10. Need less to say I ended up adding about 4 inches to the overall length, and had to adjust the bodice. She really loved the dress, and said she wants another one for college (In case she has a formal to go to).

This is a front view of the dress. She is so much taller than all of her friends, that when she takes pictures with them she has a tendency to slump over to their height. (I remember doing the same thing when I was her age.)

Here is a picture of the back of the dress:

I can't believe it by the end of the month my youngest will graduate from high school! I must admit I will definitely miss having her around. My husband and I are working on finding a new way of life, now that there will be no more kids in the house.

Now I'll have tons of time to sew. My daughter has already given me a project. Snugglies for her and her college roomate with the college logo embroidered on them. If anyone is interested, I found a pattern at SNUGGLIE.

I know she's growing up because she even went out and bought the fleece for it, and cut it out for me. She said she would have sewn it, but didn't know how to turn on or setup the sewing machine. Before she would have never done that, she always said "why do I need to sew when I can tell you". Oh well, "TIMES, THEY ARE A CHANGING".

Thursday, April 9, 2009

My Spring dress

Well I decided to do something in a springy print. This pattern is Vogue 8555. I found a flowerful print at the quilt shop, and decided I wanted to try it out in this pattern:

It's very comfortable. I didn't have to do much alterations; I decided not to put the pockets in the dress. I do think I'll make it a size smaller next time though, I think the pattern ran a little large in the bodice. But I most definitely will be making it again.

Now for my next project:

Vogue 2891 for my daughter's senior prom; I've got 2 weeks to get it done! One alteration I've already got in mind is to bring up the back skirt some, so there isn't as much back out.

Wish me luck!

Monday, October 6, 2008

NL 6826 - New TNT pattern.

Well, I've found me a new TNT Pattern. Its New Look Jumper 6826. I wanted something easy to make that I could wear with a Turtleneck and tights now that the cold weather is approaching. I've made it twice now (both out of a light weight wool). One is a houndstooth print.

This is from my fabric stash. I took about two yards. I had to make the following changes to the pattern:
  1. Added 2 1/2 inches to the overall length.
  2. I made a size 14 but altered it to a larger width at the full hip (specifically in the back); which meant I had to redistribute the pleats.
  3. Added 1/2 inch to length of bodice (yoke) piece.


I made the dress in a solid grey wool the first time I made it. I did it specifically by the pattern, although it was quick; I really didn't like the finishing on the inside. I wanted a lot cleaner finish on the inside, so I sewed the zipper and straps in place before adding the yoke lining. I also used a centered invisible zipper; the pattern called for an overlapped zipper.

Below, a picture of the houndstooth dress, the zippers edges are not exposed as they are in the first version of the dress (the grey). The ends of the dress-straps are sewing with in the facing on the houndstooth version, in contrast to the grey version,where the straps were hand sewn to the bodice. I like the houndstooth version of the dress inside so much better


If you're a beginning sewing, definitely give this pattern a try.