Showing posts sorted by date for query Accuquilt. Sort by relevance Show all posts

Tuesday, June 15, 2021

Mapping EQ8 Block to Accuquilt Qube:

If you’ve read my blog then you know I had a fall on ice back in March, 2021.  Well I wound up  having surgery for a herniated disk.  So again, no sewing at all for me for a while.

When covid began, I decided to focus on learning to use my EQ8 software and Accuquilt.  For this post that I have decided to step thru a block and map it to Accuquilt (that’s one of things I’ve learned to focus on).

Everyone asks about the “Storm at Sea” done in Accuquilt qube (Note: Accuquilt has a BOB (block on board) for the Storm a Sea also).

The “Storm at Sea” can be found in EQ8 (standard and part of the Block-Base).  I used the BaseBlock pattern (2187).  This block size is 8”.  But if you map the block in one size it is very easy to create it in another size using the qubes.

So, let’s begin, the block looks as follows: 


1.      This is an 8” block.  Let us break this down to 2” units.  I’ve done this for you already by drawing a 2” grid.


1.      If you look you will see this has a set of grids that are repeated 4 times to create the actual block


.N  Now let us go to the EQ8 Rotary cutting instructions for the block. NOTE: I’ve added the cutting lines to separate the quadrants of the block).

1.  Looking at the quadraLooking at the quadrant, we will need shapes A, B, C, D, E, F, G.

1.      Now let’s look at the rotary cutting directions for each of these blocks: 

Shape A is a 1” half square triangle (cut 1 7/8” sides); Qube shape #5


Shape B
and shape C are mirrors of each other, and are equivalent to Qube shape 14.  Shape G is a triangle in the middle of a square.  Combined this square with shape B and shape C you have the “triangle in square” shape in the qube set; Qube shapes 14 and 13


Shape D is a 2” half square triangle (cut 1 7/8’ sides); Qube shape 3


Shape E is a finished 1” square (cut 1 ½” square); Qube shape 2.


The corner squares are a combination of shape A & F, and the corner block is a square in a square. And is made of Qube shapes 5 and 6.

In summary the shapes needed from a single qube set are: 2, 3, 5, 6, 13, and 14; which requires you to have the "mix n match" set along wi hthe accompanied "angle" set. 

Also with the rotary output you have a listing of how many of each size to cut in each shape and color.  For example shape 5 (equivalent to shape A) will be 16 cuts in purple and 8 in white.  Since B and C are mirrors of each other, you would cut 8 of shape 14 in one direction and 8 of shape 8 in the other direction.  With different qube sizes you can make different block sizes, just be sure to use the shape numbers specifie above:  

4” qube set => 8” square

6” qube set => 12” square

8” qube set => 16” square

10” qube set => 20” square

12” qube set => 24” squae

NOTE: If you use one of the larger sizes then you could easily replace the corner square with a more elaborate block. 

Also, these documents will come in handy when determining if a design can be mapped to Qube shapes:

Product Catalog => Download a Catalog (accuquilt.com)

Cutting Equivalent Chart =>GO_Cutting_Equivalents_Chart-QQJ31.pdf (accuquilt.com)


Happy Sewing Everyone!!!!


Friday, November 6, 2020

Quilting Part 3 (2020 Survival Sewing).

So I have decided to call these quilts my "2020 Survival Quilts" .  I don't know about everyone else, but everything that has gone on this year is taking its toll on me mentally.

So sewing has become my therapy.  I've been averaging a quilt top every 2 weeks or so.  Ive been doing this since about September timeframe.

I call this part 3 but this is actually my 6th quilt top.  The first 3 were lap quilts.  But for some reason I just don't feel like that size is very usable for me.   I tend to do quilts that are queen/full size. These latest quilts are 80 inches in size or larger.  I like for my quilts to be "used" by the people that received them.  I learned that I am a "UTILITY" quilter; meaning that I like for my quilts to be "utilitized".  (Don't you love the sound of that ๐Ÿ˜€).

My husband asked me what were we going to do with all of these quilts.  I told him I haven't thought that far yet!  However, I do think I've just about got him convinced that he needs to invest in a Long Arm quilting machine for me.  My husband even mentioned that it could be an investment towards retirement.  Plus with as many quilts I'm making, its cost well over the monthly note for a long arm quilting machine.

Now onto quilt #3: 

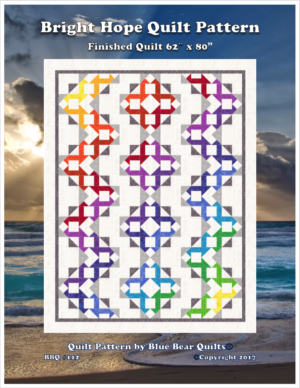
I saw this pattern on a stroll thru instagram, and fell in love with the pattern.  It's called "Bright Hope" from Blue Bear Quilts": 

Image from www.bluebearquilts.com

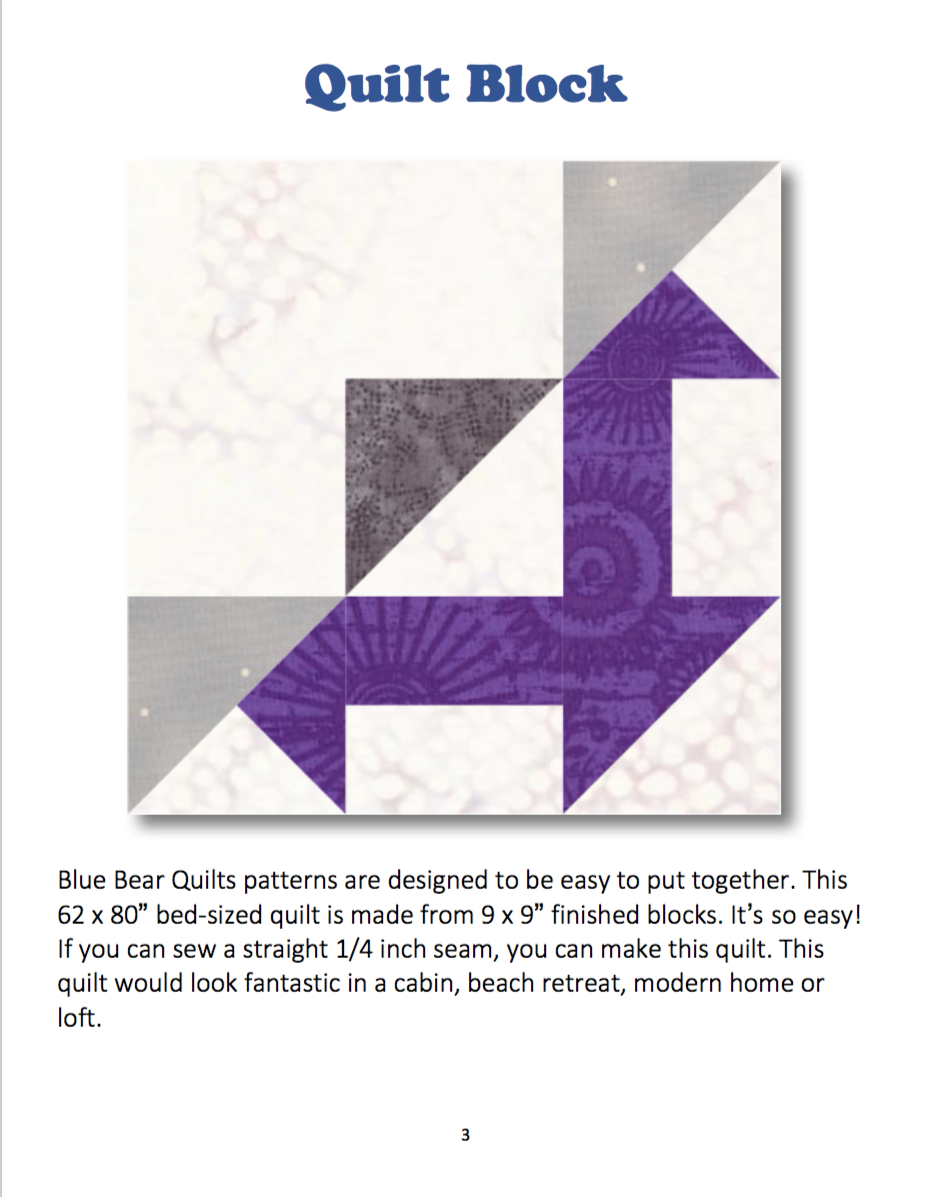
Althought the quilt design looks very involved is based on one block.
Image from www.bluebearquilts.com

I did some "reverse engineering" (The engineer in me creeps out every once in a while). I entered the design into Electic Quilt 8 (Quilt design software). Then I added images of my fabric and was able to get a preview of what the finished quilt would look like. This is my variation of the design from my Electric Quilt software..


During my 2020 survival journey I've had a couple of goals in mind: 

  1. Learn to use my Electric Quilt 8 software
  2. Use my Accuquilt cutter to cut out my design as much as possible (I own all of the qube sets, so I can create just about any block design.
  3. Use as many of my exsting fabric stash as possible.
I used my Accuquilt quilt dies to cut out the block pieces.  This reduced my cutting time tremendously!


If you want something that looks complicated, but is simple to put together definitly visit Blue Bear Patterns and give this pattern a go.  They have some really interesting quilt designs.

This quilt along with the previous one, will be going to the quilter by next week.

Maybe by Christmas I'll get that long arm quilting machine ๐Ÿ˜‰

Happy Sewing Everyone!


Thursday, October 15, 2020

Quilting part 2

 So here is my 2nd quilt completed during these pandemic/unrest times.  My sewing is what is keeping me sane.  Its become my therapy!

This is my second quilt in this journey of learning my Electric Quilt software.  This time I set the blocks on the diagonal, in an attempt to reduce the amount of bias edges.

Quilt Design in Electric Quilt

I love the fact that I can scan in images of my fabric to get a somewhat true vision of the final quilt.

Here is the actual completed quilt.  It measures 86x86, and will go off to the quilter on Monday with 2 other quilts.

Photo of completed quilt

This quilt was done using sttip peicing and making half-square triangles and quarter-square triangles. I am so excited that the quilt looks like the EQ image.

Photo of completed quilt taken outside 

I've already started the third one.  I designed it in Electric Quilt and will be using my Accuquilt dies to do the actual cutting. At the rate I'm going it should be completed in about 2 weeks.

If I keep paying a quilter to do the quilting, I may as well look into buying a longarm machine.  I figure by the time I pay the 10th quilt to be quilted, my husband will be agreeable to it. 

So 3 down, 7 more to go! ๐Ÿ˜‰


Happy Sewing!

Sunday, August 4, 2019

International Quilt Museum, Lincoln NE

So now that I have kids in Nebraska, I make a trip there every month or so.

There are two places that I go regularly when I go:
  1. The International Quilt Museum
  2. The local quilt shops between Lincoln/Omaha.
Back in 2015, I did a tour of the Accuquilt headquarters!  Yes, I have “Quilting on the Brain”, actually anything sewing related!

So the day after July 4th, I headed to the IQM (International Quilt Museum) in Lincoln, NE.  They had just opened their new exhibit, “Duality”.

I always love spending a couple of hours walking thru the IQM.  Not only is it a quilting education, but it opens your eyes to the different cultures.

Did you know that India bought in African’s as slaves and mercenaries back in the 1600’s?  These people are known as the “Siddi” and still exist as an ethnic group!  This was part of the “Collecting and Recollecting” exhibit.


The wow factor was the “DUALITY” exhibit!  This exhibit just made your mouth drop open!
Emiko Loeb, has taken the log cabin pattern to a whole new level!  When I walked thru this exhibit initially, I wasn’t aware that each quilt, has a back that is just as amazing as the front!  As matter of fact you don’t know which side is considered the front and which is the back!  I probably spent a good two hours just in this area alone.  I was just awestruck by her talent.

For example one of the quilts on exhibit is called “The Promise”.   Here is one side of the quilts:

One side of Promise Quilt

The Other Side of the Promise quilt!
Every time I go to IQM, I have never been disappointed!  (I hate I missed the “Kuba to Kente” exhibit, but I know there will be others).  My husband has encouraged me to get a membership, since this place is a must see every time I’m in the Omaha area.  He’s even gone with me before, and was totally amazed and overwhelmed!

I just had to share my experience at IQM.  So if you are in Lincoln, definitely make a trip to the IQM, you won’t be disappointed!

Well back to my regularly scheduled sewing program....

Happy Sewing!

Saturday, December 26, 2015

Fabric Friday: AccuQuilt GO!


I hope you had a Merry Christmas!

Although I haven't done much posting, I have been sewing.

For the holidays, I went to Omaha, NE to visit my boys.  As we were driving down I-80, I saw the AccuQuilt sign.


Its the main headquarters! So I called the number from the Quilters Traveler Companion (Yes, I own one of those thick books!) And they offer tours! So you know what I did right.
I took the AccuQuilt Tour!  Even though it was rainy that day; I've never been known to let a little rain get in the way of me and something sewing related!

It was a quick tour of their Quilt Exhibit (which changes regularly) and the Design Center.  The folks there were beyond friendly.  I got an opportunity to meet the owner and CEO!  As I went on the tour, they allowed me to take pictures!


The theme for the current quilt exhibit is "Quilts of Valor" (Go to http://www.qovf.org for more information)  Behind sliding glass doors is a mini-exhibit hall!
Here are some of the quilts that were displayed in the mini-exhibit:

After that I was taken to the Design Center.  All I can say is, I fell in love with this part of the tour.
There were multiple sewing machines: Bernina, Janome, etc.  And of course there was the AccuQuilt machines.  Every machine that AccuQuilt makes was in the room and hundreds of cutting dies!


Needless to say this was my favorite room!

I got an opportunity to visit the warehouse, and in the main entrance you see samples of quilts made using the AccuQuilt dies.
I thoroughly enjoyed the short tour.  I of course came home with the AccuQuilt Go!. I love the design and portability of the machine. I'm familiar with AccuQuilt from my scrapbooking.  They have a machine called AccuCut that is used for paper scrapbooking.  I used the AccuCut machines at my Local Scrapbook store, prior to their closing.  When they closed, I purchased a Sizzix and Cricut Original to use at home.  I'm expanding these to use in my sewing.
Picture from AccuQuilt.com
And when I spotted the two dies for Sunbonnet Sue and Overall Sam, I had to get those.  These were my grandmother's most used quilting patterns. 

This will definitely be greatly used in my quilting; as I am currently working on quilts for my kids and to "spruce" up my house.

As we were making our trip back, I discovered a cute quilt shop in Ogallala, NE; which will now become a regular stop on our trips to Nebraska.I bought a couple of pieces of fabric, etc.  I'll post about that later.